Indesit 7kg Washing Machine Manual: A Comprehensive Guide
Welcome! This manual provides detailed instructions for optimal use and care of your new Indesit 7kg washing machine, ensuring years of reliable performance․
Congratulations on choosing an Indesit 7kg washing machine! This appliance is designed to provide efficient and reliable laundry care for your household․ This manual serves as a comprehensive guide, walking you through everything from initial setup and operation to maintenance and troubleshooting․
The 7kg capacity is ideal for families and individuals alike, comfortably handling everyday laundry loads․ We’ve incorporated advanced features to deliver excellent washing results while minimizing water and energy consumption․ Before using your new machine, please take the time to carefully read this manual․ Understanding its functions and following the provided instructions will ensure optimal performance, prolong the lifespan of your appliance, and maintain your warranty validity․ We are confident that your Indesit washing machine will become an invaluable part of your home․
Safety Precautions
Important Safety Information: Your safety is paramount․ Before operating this Indesit 7kg washing machine, please read and understand all safety precautions outlined in this section․ Improper installation or use could result in injury or damage․ Ensure the machine is properly grounded to prevent electric shock․ Never attempt to repair the appliance yourself; contact a qualified technician for all repairs․
Keep children and pets away from the washing machine during operation․ Do not overload the machine, as this can affect performance and potentially cause damage․ Avoid contact with water inside the drum during and immediately after a wash cycle․ Always disconnect the power supply before cleaning or performing maintenance․ Failure to adhere to these safety guidelines could void your warranty and compromise your well-being․
General Safety Warnings
Read Carefully: This Indesit 7kg washing machine is designed for household use only․ Do not use it for commercial or industrial purposes․ Always supervise children near the appliance․ Never allow anyone to sit or stand on top of the washing machine․ Ensure adequate ventilation around the machine during operation․
Do not wash items that have been cleaned with flammable liquids․ Avoid washing bulky items that could unbalance the machine․ Regularly check the water supply and drain hoses for leaks or damage․ If the machine is damaged, do not use it and contact customer support immediately․ Improper use can lead to hazards; prioritize safety․ Always follow the manufacturer’s instructions for loading and detergent usage to prevent issues․
Electrical Safety
Important Precautions: Before connecting your Indesit 7kg washing machine, ensure the voltage marked on the appliance corresponds with your household supply․ Never use extension cords or adapters․ Always plug the machine directly into a grounded electrical outlet․ Do not operate the machine with a damaged power cord or plug – replace immediately․
Avoid touching the plug with wet hands․ Disconnect the machine from the power supply before cleaning or performing any maintenance․ If the electrical supply cord is damaged, it must be replaced by the manufacturer, its service agent, or similarly qualified persons to avoid hazard․ Never attempt to repair the machine yourself; contact qualified personnel․ Electrical shock is a serious risk; prioritize safety․
Child Safety
Supervision is Key: Never allow children to play with, on, or around the Indesit 7kg washing machine․ Close supervision is essential․ The door can become hot during operation – keep children away․ Detergent and cleaning products are harmful; store them securely out of reach․
Do not allow children to climb inside the drum․ Always lock the control panel when not in use, if your model has this feature․ Explain the dangers of operating the machine to older children․ After use, ensure the door is closed and latched․ The machine is not intended for use by young children or those with reduced physical, sensory, or mental capabilities without supervision․ Prioritize a safe environment for children․
Machine Overview & Components
Familiarize Yourself: Your Indesit 7kg washing machine is designed for efficient and reliable laundry care․ This section details the key components․ The front panel houses the control interface for program selection and settings adjustments․ The detergent drawer is where you add detergent, fabric softener, and pre-wash agents․
Inside, the drum holds your laundry during the wash cycle․ Access to the filter, crucial for removing debris, is typically located at the bottom front of the machine․ The rear panel features connections for the water supply and drain hose․ Understanding these components will aid in proper operation and maintenance, maximizing your machine’s lifespan․
Front Panel Controls Explained
Navigating the Interface: The front panel is your command center․ The central Program Selector Dial allows you to choose the appropriate wash cycle – Cotton, Synthetics, Delicates, and more․ To the right, you’ll find Temperature Settings, enabling adjustments for water temperature based on fabric type․ Adjacent to this are Spin Speed Options, controlling the intensity of the final spin cycle․
Below these, Additional Function Buttons offer features like Delay Start for convenient scheduling, Extra Rinse for thorough cleaning, and pre-wash options․ An On/Off button initiates or terminates the washing process․ The Display Screen provides cycle progress and any error messages․ Understanding each control ensures you select the optimal settings for every load․
Detergent Drawer & Dispenser
Understanding the Compartments: The detergent drawer is typically divided into three compartments․ The compartment marked with “I” or a Roman numeral ‘I’ is for pre-wash detergent, used for heavily soiled items․ The main wash detergent goes into the compartment marked with “II” or ‘II’․ For fabric softener, use the compartment usually indicated by a flower symbol or marked ‘*’․
Dosage is Key: Always follow the detergent manufacturer’s instructions regarding dosage․ Overuse can lead to residue buildup, while underuse may result in insufficient cleaning․ Ensure the drawer clicks securely closed after loading․ Regularly cleaning the drawer prevents blockages and ensures optimal detergent distribution during each wash cycle․
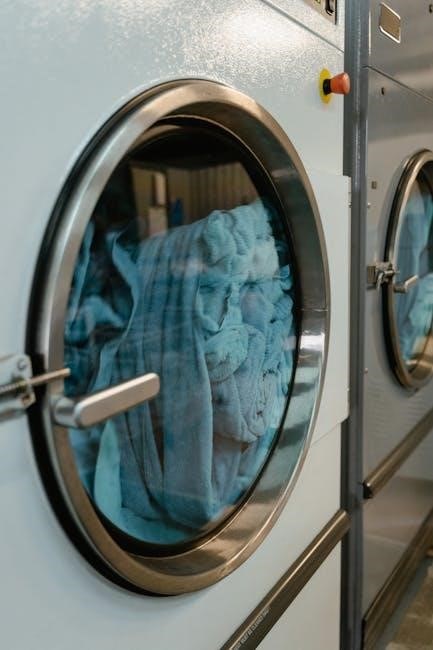
Drum & Filter Access
Accessing the Drum: The washing machine drum is accessed through the front-loading door․ Ensure the machine is switched off and unplugged before reaching inside, even to remove forgotten items․ Avoid forcing objects into the drum, as this could damage the internal components․
Locating the Filter: The filter, crucial for preventing blockages, is usually located behind a small access panel at the bottom front of the machine․ You may need a flathead screwdriver to open the panel․ Important: Have a shallow container and towels ready, as some water will spill when removing the filter․ Regularly cleaning this filter (at least every few months) maintains optimal performance and prevents drainage issues․
Getting Started: Installation
Before Installation: Carefully read all instructions before beginning․ Ensure you have the necessary tools – pliers, a spirit level, and potentially an adjustable wrench․ Check for any visible damage to the machine after unpacking․ Installation should be performed by a qualified individual if you are unsure about any step․
Site Requirements: The machine needs a stable, level floor capable of supporting its weight, even when fully loaded․ Adequate ventilation is essential; avoid enclosing the machine in a tight space․ Ensure easy access to water supply and drainage points․ Incorrect installation can void your warranty and lead to operational problems․
Unpacking & Initial Inspection
Careful Unpacking: Gently remove all packaging materials, including transit bolts – these are crucial to remove before operation! Retain the packaging for potential future transport․ Inspect the washing machine thoroughly for any signs of damage incurred during shipping, such as dents, scratches, or broken parts․
Component Check: Verify that all included accessories are present: the water inlet hose(s), drain hose, and this instruction manual․ Check the drum inside the machine for any loose items left from the manufacturing process․ Report any damage or missing components to the retailer immediately․ Do not attempt to use a damaged machine․
Positioning & Leveling
Stable Surface: Place the washing machine on a firm, level floor capable of supporting its weight, especially when fully loaded with wet laundry․ Avoid uneven surfaces to prevent excessive vibration and noise during operation․ Ensure sufficient space around the machine for ventilation and easy access for maintenance․
Adjustable Feet: Use the adjustable feet to level the machine․ Rotate them clockwise or counterclockwise until all four feet firmly contact the floor and the machine no longer rocks․ A spirit level can be used to confirm accurate leveling․ Proper leveling minimizes noise and ensures stable operation, extending the machine’s lifespan․
Connecting Water Supply & Drain Hose
Water Inlet: Connect the water inlet hose to a cold water supply with sufficient pressure (see technical specifications)․ Ensure the hose is securely tightened to prevent leaks․ Use the supplied washers for a watertight seal․ Do not use used hoses․
Drain Hose: Position the drain hose into a standpipe or securely over the edge of a sink, ensuring it’s at the correct height (typically 60-90cm) to allow for proper drainage․ Avoid kinks or obstructions in the hose․ Securely fasten the hose to prevent it from dislodging during operation, preventing potential flooding․
Understanding the Control Panel
Intuitive Design: Your Indesit 7kg washing machine features a user-friendly control panel designed for ease of operation․ Familiarize yourself with the layout before first use․ The central Program Selector Dial allows you to choose the appropriate wash cycle for your laundry․
Key Controls: Alongside the dial, you’ll find buttons for adjusting Temperature Settings and Spin Speed Options․ Additional Function Buttons, such as Delay Start and Extra Rinse, offer customized washing experiences․ The display panel clearly indicates the selected program, remaining time, and any active functions․
Program Selector Dial – A Detailed Breakdown

Cycle Options: The Program Selector Dial is your primary control for choosing wash cycles․ Key programs include Cotton, for everyday items; Synthetics, for blended fabrics; and Delicate/Wool, for sensitive materials; A convenient Quick Wash program handles lightly soiled loads efficiently․
Specialized Cycles: Explore options like Eco, designed for energy savings, and specific cycles for Jeans or Dark Garments․ The dial also features settings for Rinse & Spin and Spin Only․ Refer to the program guide for detailed descriptions of each cycle and recommended load types․ Always select the most appropriate program for optimal results․
Temperature Settings
Adjusting Wash Temperature: Your Indesit 7kg washing machine allows precise temperature control․ Options typically range from Cold Wash (0°C), ideal for delicate fabrics and preventing color fading, to 90°C for heavily soiled whites․ A Mixed Fabrics (40°C/60°C) setting offers versatility․
Understanding Temperature Impact: Lower temperatures save energy and protect fabrics, while higher temperatures enhance cleaning power for stubborn stains․ Always check garment care labels before selecting a temperature․ Incorrect temperatures can cause shrinkage or damage․ The selected temperature is displayed on the control panel during the wash cycle․ Experiment to find the best setting for your laundry needs!
Spin Speed Options
Controlling Moisture Levels: Your Indesit 7kg washing machine offers variable spin speeds, measured in revolutions per minute (RPM)․ Lower speeds (400-800 RPM) are gentler on delicate items, reducing wrinkles but leaving clothes wetter․ Higher speeds (1000-1400 RPM) extract more water, shortening drying time, but can cause more creasing․
Choosing the Right Speed: For synthetics and everyday laundry, 800-1000 RPM is usually sufficient․ Heavy items like towels and jeans benefit from 1200-1400 RPM․ A No Spin option is available for hand-wash items or to avoid excessive creasing․ Remember, higher spin speeds consume more energy․ The selected spin speed is clearly indicated on the machine’s display․
Additional Function Buttons (e․g․, Delay Start, Extra Rinse)
Enhancing Your Wash: Your Indesit 7kg machine features several helpful function buttons․ Delay Start allows you to set a delayed wash cycle, convenient for off-peak energy rates or scheduling around your day․ Extra Rinse provides an additional rinse cycle, ideal for sensitive skin or heavily soiled items, ensuring thorough detergent removal․

Other Useful Options: The Pre-wash function is beneficial for extremely dirty laundry, while Intensive Stain targets stubborn marks․ A Crease Reduction option minimizes wrinkles․ Consult the program guide for which functions are compatible with each wash cycle․ These buttons are clearly labelled on the control panel, enhancing your washing experience․
Washing Programs – A Guide
Program Selection: Your Indesit 7kg washing machine offers a variety of programs tailored to different fabric types and soil levels․ Understanding these programs is key to achieving optimal cleaning results and protecting your clothes․ We’ll explore the most commonly used cycles, detailing their specific settings and recommended uses․
Cycle Overview: From the robust Cotton program for everyday items to the gentle Delicates/Wool cycle, each program is designed with specific parameters․ The Synthetics program handles mixed fabrics, while Quick Wash provides a fast refresh for lightly soiled loads․ Don’t forget the energy-efficient Eco program! Refer to the detailed descriptions within this section for each program’s nuances․
Cotton Program – Usage & Settings
Ideal for: Durable cotton items like t-shirts, bed linen, and towels․ This program utilizes higher temperatures and vigorous washing action to effectively remove dirt and stains from robust fabrics․ Maximum Load: 7kg․
Settings: Temperature can be adjusted from 40°C to 90°C, with 60°C recommended for most cottons․ Spin speed ranges from 800 to 1400 RPM; higher speeds extract more water but may increase creasing․ Select ‘Pre-wash’ for heavily soiled items․ Use a standard laundry detergent appropriate for cotton fabrics․ Avoid overloading the machine to ensure thorough cleaning and prevent damage․ Always check garment care labels before selecting this program․
Synthetics Program – Optimal Settings
Designed for: Washing synthetic fabrics like polyester, nylon, and acrylics․ This program employs a gentler wash action and lower temperatures to protect these materials from damage and fading․ Recommended Load: Up to 3․5kg․
Optimal Settings: Typically, a temperature of 40°C is sufficient for synthetics, though some items can be washed at 30°C․ Spin speed should be set between 600 and 800 RPM to minimize creasing and stretching․ Use a liquid detergent specifically formulated for synthetic fabrics․ Avoid using fabric softener, as it can coat synthetic fibers and reduce their breathability․ Always consult the garment’s care label for specific washing instructions before starting the cycle․
Delicate/Wool Program – Gentle Washing
Designed for: Washing delicate items like silk, lace, and wool garments․ This program utilizes a very gentle wash action and cool temperatures to prevent shrinking, stretching, or damage to these sensitive fabrics․ Recommended Load: Maximum 2kg․
Optimal Settings: Always use a temperature of 30°C or lower for wool and delicate items․ Select a spin speed of 400-600 RPM, or even a ‘no spin’ option for extremely delicate garments․ Crucially, use a detergent specifically designed for wool or delicates – standard detergents can be too harsh․ Consider placing delicate items inside a mesh laundry bag for added protection during the wash cycle․ Check garment care labels before washing․
Quick Wash Program – For Lightly Soiled Items
Ideal for: Refreshing clothes that are only slightly dirty and need a fast wash․ This program significantly reduces wash time, making it perfect for situations where you need clean clothes in a hurry․ Maximum Load: 3kg – do not overload․

Optimal Settings: Typically operates at a temperature of 30°C, though some models may offer a slightly higher option․ Spin speed is usually pre-set to around 800-1200 RPM․ Use a small amount of liquid detergent for best results; powder detergent may not dissolve completely in the shorter cycle․ This program is not suitable for heavily soiled items or garments requiring intensive cleaning․ Avoid using it for items that need stain removal․
Eco Program – Energy Saving Mode
Designed for: Minimizing water and energy consumption while still delivering a thorough clean․ This program is perfect for everyday laundry loads and contributes to a more sustainable lifestyle․ Maximum Load: 7kg – utilize the full capacity for optimal efficiency․
Optimal Settings: The Eco program typically operates at a lower temperature, usually 40°C or 50°C, and with a reduced spin speed․ Wash times are generally longer to compensate for the lower temperatures, ensuring effective cleaning․ Use a liquid detergent formulated for cooler washes․ While excellent for standard loads, it may not be suitable for heavily soiled items or those requiring high-temperature disinfection․ Prioritize energy savings with this environmentally conscious cycle․
Maintenance & Cleaning
Regular maintenance is crucial for prolonging the life and maintaining the performance of your Indesit 7kg washing machine․ Consistent cleaning prevents build-up, eliminates odors, and ensures hygienic laundry results․ We recommend performing these tasks monthly, or more frequently with heavy use․

Key areas to focus on: the detergent drawer, the washing machine drum, the filter (located at the front of the machine), and descaling to remove limescale deposits․ Ignoring these areas can lead to reduced efficiency, unpleasant smells, and potential damage․ Always disconnect the power supply before undertaking any cleaning or maintenance procedures․ Refer to the following sections for detailed step-by-step instructions․
Cleaning the Detergent Drawer
The detergent drawer can accumulate residue from detergents and fabric softeners, leading to blockages and reduced cleaning performance․ To clean it, first, locate the release button (usually a small symbol) and gently pull the drawer outwards․
Remove any detachable parts, such as the fabric softener insert, and rinse them thoroughly under warm running water․ Use an old toothbrush or small brush to scrub away any stubborn residue from all compartments․ For heavily soiled drawers, soak them in warm, soapy water for about 30 minutes before scrubbing․ Ensure all parts are completely dry before reassembling and reinserting the drawer into the machine․
Cleaning the Drum
Regular drum cleaning prevents the build-up of mold, mildew, and detergent residue, maintaining hygiene and optimal washing performance․ To clean the drum, run an empty wash cycle at a high temperature (90°C or the hottest setting available) using a washing machine cleaner․

Alternatively, you can use a cup of white vinegar added directly to the drum․ After the cycle completes, wipe down the inside of the drum with a clean, damp cloth․ Leave the door slightly ajar to allow the drum to air dry completely, preventing moisture build-up and further growth of unwanted microorganisms․ Repeat this process monthly․
Cleaning the Filter – Step-by-Step Guide
Locate the filter access panel, usually at the bottom front of the machine․ Have a shallow container and towels ready to catch any spilled water․ Carefully open the access panel – some models have a small drain hose, so position the container accordingly․

Slowly unscrew and remove the filter cap․ Be prepared for water to flow out․ Clean the filter thoroughly, removing any lint, coins, hair, or other debris․ Check the filter housing for obstructions․ Replace the filter cap securely, ensuring a tight seal to prevent leaks․ Close the access panel․
Descaling the Machine
Over time, limescale can build up inside your washing machine, reducing its efficiency and lifespan․ To descale, use a commercially available descaling product specifically designed for washing machines – follow the product’s instructions carefully․ Alternatively, you can use white vinegar․
Pour two cups of white vinegar into the detergent drawer․ Run an empty wash cycle at a high temperature (60°C or hotter) without any laundry․ Repeat this process if you live in a hard water area․ After the cycle, run a rinse cycle to remove any remaining vinegar residue․
Troubleshooting Common Issues
Encountering problems? This section addresses frequent issues with your Indesit 7kg washing machine․ Before contacting customer support, review these solutions․ If the machine doesn’t start, check the power supply and door closure․ For drainage problems, inspect the drain hose for kinks or blockages and clean the filter․
Error codes displayed on the control panel indicate specific faults – consult the ‘Error Codes & Their Meanings’ section for details․ Water leaks often stem from loose hoses or an overloaded drum; carefully inspect these areas․ Remember to always disconnect the power before attempting any repairs․
Machine Not Starting
Is your Indesit 7kg washing machine failing to power on? First, verify the power cord is securely plugged into a functioning outlet․ Test the outlet with another appliance to confirm it’s receiving power․ Next, ensure the door is completely closed and latched; the machine won’t start if the door isn’t properly secured․
Check the Start/Pause button – a brief press should initiate the cycle․ If still unresponsive, examine the control panel for any illuminated error codes, referencing the ‘Error Codes’ section․ A tripped circuit breaker could also be the culprit; reset it if necessary․ If problems persist, contact qualified service personnel․
Water Not Draining
Experiencing issues with water remaining in your Indesit 7kg washing machine after a cycle? The most common cause is a blocked drain hose․ Ensure the hose isn’t kinked, twisted, or obstructed․ Check that the drain hose is correctly positioned in the standpipe or sink, at the appropriate height (refer to the ‘Installation’ section)․
A clogged filter is another frequent issue․ Carefully access and clean the filter (see ‘Cleaning the Filter’ for detailed instructions)․ If the drain pump is faulty, it may require professional repair․ Before calling service, verify the drain isn’t frozen in colder climates․
Error Codes & Their Meanings
Your Indesit 7kg washing machine utilizes error codes to diagnose potential problems․ A flashing code on the display indicates an issue requiring attention․ F01 signals a water intake problem – check the water supply and inlet hose․ F02 indicates a drainage issue; verify the drain hose and filter are clear․
F03 suggests a temperature sensor fault, requiring professional service․ F04 points to an over-sudsing issue – use less detergent․ F05 indicates a water pressure problem․ F06 relates to a communication error․ F11 signals an issue with the door lock․ Always consult a qualified technician for codes beyond simple fixes․
Leaking Water – Identifying the Source
Discovering a leak requires immediate investigation․ First, check the water inlet hose connections at both the machine and the tap – ensure they are tight․ Inspect the drain hose for cracks or loose fittings․ Examine the door seal (rubber gasket) for damage or obstructions․
Water may also leak from underneath, indicating a problem with the pump, tub seal, or internal hoses․ Do not attempt to disassemble the machine yourself; this requires a qualified technician․ Always disconnect the power supply before investigating any leak․ A small amount of condensation during operation is normal, but significant pooling is not․
Technical Specifications
Model Number: ITW71250ECOUK
Capacity: 7kg
Maximum Spin Speed: 1200 RPM
Energy Efficiency Class: E
Water Consumption (per cycle): 49 Litres
Dimensions (H x W x D): 85cm x 60cm x 59․5cm
Voltage: 220-240V
Frequency: 50Hz
Power Consumption: 2000W (maximum)
Program Number: 16
Drum Material: Stainless Steel
Weight: 65kg․ These specifications are subject to change without notice․ Refer to the product label for the most accurate information․