Welcome to the Oster Ice Cream Maker, model FRSTIC-GC0. This 1.5-quart machine crafts ice cream, frozen yogurt, and sorbet with ease. The included manual provides recipes and guidance for optimal results, making homemade treats a delightful experience.
Product Overview
The Oster Ice Cream Maker, model FRSTIC-GC0, is a versatile 1.5-quart appliance designed for crafting homemade ice cream, frozen yogurt, and sorbet. Its compact design and user-friendly interface make it ideal for both beginners and experienced users. The machine features a refrigerated basin with a depth of 120 mm, capable of holding up to 5 ice cream containers. Perfect for creating personalized treats, it comes with a comprehensive manual and recipe guide to ensure delicious results every time.
Key Features of the Oster Ice Cream Maker
The Oster Ice Cream Maker, model FRSTIC-GC0, offers a 1.5-quart capacity, perfect for family-sized batches. It features a quick-freeze function and an easy-to-use design. The machine includes a recipe book with classic and customizable options. Its compact size and dishwasher-safe parts ensure easy cleanup. Designed for versatility, it allows users to create ice cream, frozen yogurt, and sorbet with minimal effort. The manual provides detailed instructions for operation and care, ensuring optimal performance and delicious results.
Intended Use and Benefits
The Oster Ice Cream Maker is designed for household use, enabling homemade creation of ice cream, frozen yogurt, and sorbet. It offers convenience and customization, allowing users to craft healthier treats with fresh ingredients. The machine eliminates the need for pre-freezing bowls, making it user-friendly. Perfect for families, it encourages creativity in dessert-making while providing a fun and easy way to enjoy favorite frozen treats. Its compact design and simple operation make it an ideal addition to any kitchen.
Compatible Models and Variants
Oster offers multiple models, including the 4746 and 4749, each with unique features. The FRSTIC-GC0 model is a 1.5-quart capacity maker, while the FRSTIC-WDB features a 4-quart wooden bucket design. These variants cater to different preferences, from compact to larger batches, ensuring suitability for various kitchen setups and user needs. Each model includes detailed manuals for operation, ensuring seamless functionality regardless of the chosen variant.

Safety Precautions and Electrical Requirements
Ensure safe operation by following electrical guidelines and precautions. Avoid submerging cords in water and keep children away. Use the correct power supply as specified in the manual for optimal performance and safety.
General Safety Tips for Handling the Appliance
Always read the instruction manual carefully before use. Keep the cord and plug away from water to avoid electrical shock. Ensure the appliance is placed on a stable, dry surface. Avoid overloading the machine, as this can cause damage. Never insert metal objects or hands into moving parts. Keep children away while operating. Regularly inspect the cord for damage. Handle the frozen bowl with care, as it may be slippery. Store the appliance in a cool, dry place when not in use. Follow all safety guidelines to prevent accidents.
Electrical Requirements and Plug Specifications
The Oster Ice Cream Maker operates on standard household electrical requirements, typically 120 volts at 50-60 Hz. Use the original cord and plug provided to ensure safe and proper operation. The appliance is designed for indoor use only. Avoid using damaged cords or plugs, as this can pose a safety risk. For specific model details, refer to the user manual or contact customer support. Always use the correct voltage to prevent damage or malfunction.
Important Handling Precautions
Always handle the Oster Ice Cream Maker with care to ensure safety and longevity. Avoid touching hot surfaces or moving parts during operation. Keep children away from the machine while it is in use. Never submerge electrical components in water or expose them to moisture. Clean the unit regularly to prevent food residue buildup. Store the machine in a cool, dry place when not in use. Follow the manual’s guidelines for disassembly and reassembly to avoid damage or injury.

Components and Accessories
The Oster Ice Cream Maker includes a motor base, mixing bowl, churn paddle, and lid. Additional accessories may vary by model, enhancing functionality and convenience.
Main Components of the Ice Cream Maker
The Oster Ice Cream Maker features a durable motor base, a BPA-free mixing bowl, a churn paddle for consistent mixing, and a clear lid for monitoring progress. These components work together to ensure smooth operation and even churning. The motor base powers the unit, while the bowl holds the mixture, and the paddle ensures even distribution of ingredients. The clear lid allows users to observe the churning process without interruption, making homemade ice cream creation straightforward and efficient.
Additional Accessories and Parts
The Oster Ice Cream Maker comes with a recipe book for inspiration and additional accessories like extra bowls and lids. These parts enhance functionality, allowing for multiple batches and convenient storage. The machine may also include measuring tools and spatulas for precise ingredient preparation. Optional attachments, such as extra paddles or flavor injectors, can be purchased separately to expand creative possibilities. These accessories ensure a seamless and enjoyable ice cream-making experience, catering to both beginners and experienced users alike.
Optional Attachments for Enhanced Functionality
Optional attachments like additional paddles or a flavor injector can enhance your Oster Ice Cream Maker’s performance. A 4-quart wooden bucket is available for larger batches, while specialized paddles improve mixing efficiency. These accessories expand creative possibilities, allowing for unique textures and flavors. They are designed to work seamlessly with the machine, ensuring optimal results. Explore these attachments to elevate your ice cream-making experience and achieve professional-quality treats at home.

Assembly and Initial Setup
Unpack and inventory all parts, then disassemble the unit for cleaning. Reassemble according to the manual, ensuring all components are securely fitted. Prepare the machine for first use by chilling the bowl and ensuring proper installation of accessories. Follow the provided guidelines for a smooth setup experience.
Unpacking and Inventory of Parts
Begin by carefully unpacking the Oster Ice Cream Maker, ensuring all components are accounted for. The unit typically includes a motor base, mixing bowl, lid, and paddle. Inspect each part for damage or defects. Familiarize yourself with the included accessories, such as the recipe book and instruction manual. Before assembly, wash the mixing bowl and ensure all parts are dry. This step ensures a smooth setup process and prepares the machine for its first use. Refer to the manual for a detailed inventory list and setup guide.
Disassembling the Unit for Cleaning
Before cleaning, unplug the Oster Ice Cream Maker. Remove the mixing bowl and paddle from the motor base. Wash these parts with warm, soapy water, using a soft brush for stubborn residue. Rinse thoroughly and dry to prevent water spots. For deep cleaning, refer to the manual for specific disassembly steps. Ensure all parts are clean and dry before reassembling to maintain hygiene and performance; Regular cleaning prevents residue buildup and ensures smooth operation for future use.
Assembling the Ice Cream Maker
To assemble the Oster Ice Cream Maker, start by placing the motor base on a stable surface. Align the mixing bowl with the base and secure it firmly. Attach the paddles to the mixing arm, ensuring they are properly aligned. Place the lid on the bowl, making sure it fits snugly. Double-check that all parts are correctly aligned and securely fitted. Plug in the unit and ensure all components are dry to avoid slipping. Follow the manual for detailed assembly steps to ensure proper function and safety.
Preparing the Machine for First Use
Before first use, wash all removable parts with warm soapy water and rinse thoroughly. Dry the components with a clean towel to prevent water spots. Ensure the mixing bowl and lid are completely dry to avoid slipping. Place the bowl in the freezer for at least 6 hours to pre-chill. Once chilled, assemble the machine according to the instructions. Plug in the unit and let it run for a few minutes to ensure proper function. Always refer to the manual for specific preparation steps.

Operating Instructions
The Oster Ice Cream Maker offers a simple, user-friendly design for crafting homemade treats. With a 1.5-quart capacity, it churns ingredients into smooth, creamy desserts. Always pre-chill the bowl, add your mixture, and let the machine do the work. Follow the manual for precise churning times and ingredient ratios to ensure perfect results every time.
Basic Steps to Start Making Ice Cream
Begin by pre-chilling the mixing bowl in the freezer for 6-8 hours. Combine your ingredients in a separate container and mix thoroughly. Pour the mixture into the chilled bowl, ensuring it doesn’t exceed the recommended capacity. Secure the lid and set the timer according to the manual. Let the machine churn until the desired consistency is reached. Follow the guidelines for ingredient ratios and churning times to achieve the perfect texture. Once complete, transfer the ice cream to an airtight container and freeze for firming, if needed.
Understanding the Churning Process
The churning process is essential for creating smooth, creamy ice cream. The machine agitates the mixture, incorporating air and breaking down ice crystals. This step ensures a uniform texture and prevents ice from forming. The automatic churning function simplifies the process, while monitoring the consistency helps achieve desired results. Proper ingredient temperatures and ratios are crucial for optimal churning efficiency. Allow the machine to complete its cycle for the best outcome, as interrupting it may affect the final texture.
Monitoring the Progress of Ice Cream Making
Monitor the ice cream’s progress through the transparent lid without opening it, as this can disrupt the churning process. Listen for changes in the machine’s sound, which indicate the mixture’s consistency. The process typically takes 20-30 minutes, depending on the recipe. Check the manual for specific timing guidance. Avoid overloading the machine, as this may affect performance. Stop the machine once the desired consistency is achieved, usually when the mixture has doubled in volume and appears smooth and creamy.
Proper Shutdown and Post-Use Procedures
After use, turn off the machine and unplug it from the power source. Allow the unit to cool down before cleaning. Remove all detachable parts and wash them with warm, soapy water. Regularly wipe the motor base with a damp cloth. Ensure all components are dry before storing to prevent moisture buildup. Refer to the manual for detailed cleaning instructions to maintain the machine’s performance and longevity. Proper shutdown and cleaning ensure safe operation and fresh-tasting results in future use.
Recipe Guide
Explore a variety of delicious recipes, from classic ice cream flavors to customizable creations, all designed for perfect results with your Oster machine.
Classic Ice Cream Recipes Included
The Oster Ice Cream Maker comes with a variety of classic recipes, including vanilla, chocolate, and strawberry. These timeless flavors are easy to make and always a hit. The manual also provides recipes for frozen yogurt and sorbet, offering options for lighter treats. Each recipe includes step-by-step instructions, ensuring perfect results every time. With these classic recipes, you can create delicious, homemade desserts that everyone will enjoy.
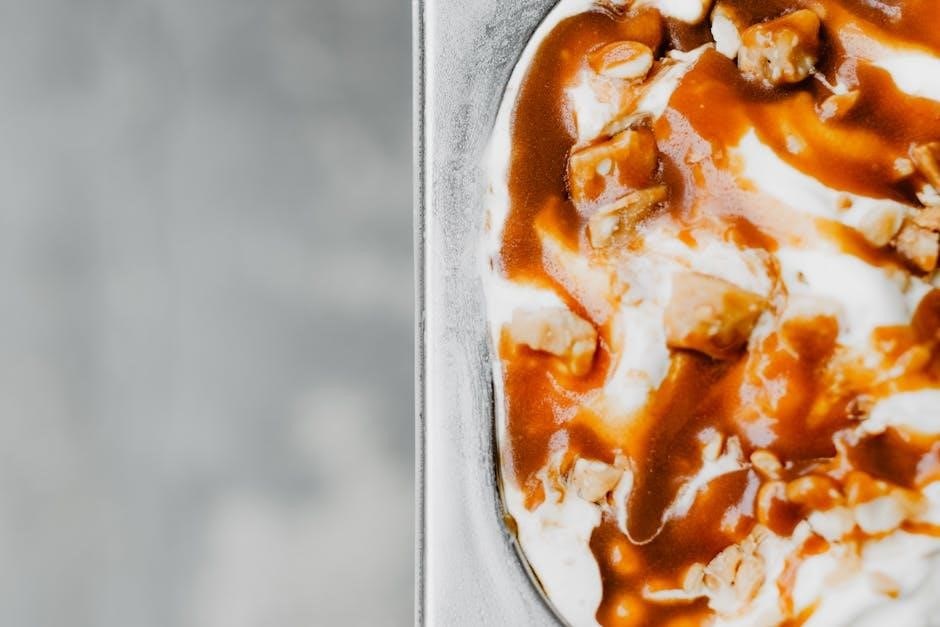
Customization Ideas for Unique Flavors
Experiment with unique flavors by adding mix-ins like nuts, candy pieces, or fruit to create personalized ice cream. Try combining vanilla with caramel swirls or infusing chocolate with mint for a refreshing twist. The manual suggests using fresh fruits or cocoa powder for natural flavor enhancements. For dairy-free options, substitute traditional milk with almond or coconut milk. These customization ideas allow you to craft one-of-a-kind flavors that suit your taste preferences and dietary needs, making every batch a new adventure.
Advanced Techniques for Perfect Texture
Achieve professional-quality texture by tempering ingredients before churning. Aging the mix for 24 hours enhances flavor and smoothness. Use the correct ratio of cream to sugar for optimal consistency. Incorporate air during churning by maintaining steady mixing speeds. For gelato-style density, churn until nearly doubled in volume. Avoid over-churning to prevent ice crystals. Experiment with stabilizers like gelatin for creamier results. These techniques ensure a smooth, velvety texture that elevates your homemade ice cream to new heights of deliciousness.

Maintenance and Cleaning
Regularly clean the machine to maintain performance. Disassemble and sanitize all parts after use. Wipe the exterior with a damp cloth. Store components securely to ensure longevity.
Cleaning the Machine After Each Use
After each use, disassemble the machine and wash all parts with mild detergent and warm water. Avoid abrasive cleaners or scrubbers to prevent damage. Rinse thoroughly and dry with a soft cloth. Regularly sanitize components to maintain hygiene. For tough residue, soak parts in warm soapy water before cleaning. Proper cleaning ensures optimal performance and prevents contamination. Always refer to the manual for specific cleaning instructions tailored to your Oster model.
Deep Cleaning and Sanitizing Procedures
For deep cleaning, mix equal parts water and white vinegar in the machine and run a full cycle without ingredients. Sanitize by wiping all surfaces with a solution of 1 tablespoon unscented bleach in 1 gallon water. Rinse thoroughly with clean water and dry. This process ensures the removal of residual flavors and bacteria, maintaining hygiene and freshness for future use. Regular deep cleaning is essential for long-term performance and safety.
Storage Tips to Maintain Performance
After cleaning, store the Oster Ice Cream Maker in a cool, dry place to prevent moisture buildup. Ensure all components are completely dry to avoid rust or mold. Avoid storing the machine in humid environments or near direct sunlight. For extended storage, drain any residual water from the bowl and leave it open to air dry. Regularly inspect stored parts for signs of wear or damage to ensure optimal performance when reused.

Troubleshooting Common Issues
If the machine stops churning or overheats, check the power cord connection. Ensure the bowl is pre-chilled and ingredients are at the correct temperature. Refer to the manual for detailed solutions and maintenance tips to resolve common issues effectively.
Identifying and Resolving Common Problems
Common issues with the Oster Ice Cream Maker include the machine not churning or producing too soft/hard ice cream. Check if the bowl is pre-chilled adequately and ensure ingredients are at the correct temperature; If the motor stops, verify power cord connections and ensure proper assembly. For soft ice cream, freeze the mixture longer before churning. Refer to the manual for troubleshooting guides and maintenance tips to address and resolve these issues effectively for optimal performance.
Error Detection and Solutions
The Oster Ice Cream Maker may display issues like uneven churning or leaks. Check if the lid is securely locked and ensure the bowl is properly assembled. If the machine stops mid-cycle, verify the power connection and restart. For inconsistent texture, ensure ingredients are chilled and measured correctly. Refer to the manual for detailed error codes and solutions. Regular cleaning and proper storage can prevent many issues, ensuring smooth operation and consistent results every time you make ice cream.
DIY Repair Tips and Tricks
For minor issues with your Oster Ice Cream Maker, try these DIY fixes. If the machine isn’t turning on, check the power cord and ensure it’s properly plugged in. For leaks, tighten the bowl or replace worn seals. Clean the churn paddle and bowl regularly to prevent residue buildup. Lubricate moving parts lightly if they stick. Always refer to the manual for disassembly guidance. These simple steps can extend the life of your machine and keep it running smoothly for years of homemade treats.

Warranty and Customer Support
The Oster Ice Cream Maker comes with a limited warranty covering manufacturing defects. For inquiries, contact customer support at 1.800.334.0759 or visit their website for assistance and online resources.
Understanding the Warranty Terms
Oster provides a limited warranty for their Ice Cream Maker, covering defects in materials and workmanship under normal use. The warranty period varies by model, typically ensuring coverage for one year from purchase. Registration may be required to activate benefits. Repairs or replacements are handled by authorized service centers. Damage from misuse or improper maintenance is excluded. For details, refer to the manual or contact customer support at 1.800.334.0759.
How to Contact Customer Support
For product questions or assistance with your Oster Ice Cream Maker, contact Sunbeam Consumer Service at 1.800.334.0759 (USA) or visit the Oster website for support. Ensure your model number, such as FRSTIC-GC0, is ready for efficient service. Save this manual for future reference, as it contains important contact information and warranty details. Visit the official Oster website for additional resources, troubleshooting guides, or downloadable manuals.
Accessing Online Resources and Manuals
Visit the official Oster website to access comprehensive resources, including downloadable PDF manuals for models like FRSTIC-GC0 and 4746. These manuals provide detailed instructions, recipes, and troubleshooting tips. For specific models, navigate to the product support section, enter your model number, and download the corresponding guide. Additionally, Oster offers online FAQs and user guides to enhance your experience with the ice cream maker. Ensure to reference these materials for optimal performance and maintenance.

Tips for Optimal Performance
For best results, use high-quality ingredients and follow recipe guidelines. Regularly clean and maintain the machine to ensure smooth operation and consistent ice cream texture.
Best Practices for Using the Machine
To ensure optimal performance, always pre-freeze the mixing bowl for 24 hours before use. Use high-quality ingredients for better flavor and texture. Avoid overfilling the bowl, as this can affect churning efficiency. Regularly clean and sanitize all parts to maintain hygiene and functionality. Follow the user manual’s guidelines for assembly, operation, and storage. Experiment with recipes but adhere to ingredient ratios for consistent results. Proper care and adherence to these practices will prolong the machine’s lifespan and ensure delicious outcomes.
Importance of Ingredient Quality
Using fresh, premium ingredients ensures rich flavors and smooth textures in your creations. Opt for real cream, fresh fruits, and pure flavorings to enhance taste. Avoid low-quality substitutes, as they can result in icy or bland ice cream. Proper ingredient ratios, as outlined in the manual, are crucial for consistency. Investing in quality ingredients directly impacts the final product, making it worth the effort for superior results every time.
Encouraging Experimentation and Creativity
Unleash your creativity by experimenting with unique flavors and mix-ins. The manual provides classic recipes, but feel free to customize with your favorite ingredients. Try adding fresh berries, nuts, or even candy pieces for personalized treats. Don’t be afraid to explore beyond traditional flavors—this machine is perfect for crafting one-of-a-kind desserts that reflect your taste and imagination. Each batch is an opportunity to innovate and create something truly special.